Showing posts with label gluten-free bread. Show all posts

Friday, March 15, 2013

Time Out

Leslie in the fog at Torrey Pines State Reserve, California
Finally, after weeks of relentless work, my wife Leslie and I are on vacation!

This is a short one - two days before a gluten-free expo at which I'm a vendor - and two days after. We "did" the San Diego Zoo  and the Thursday Farmer's Market yesterday and Torrey Pines State Reserve today. Both are wonderful places, but I found the latter a bit more visually interesting:


Torrey Pines the species are one of the most endangered in the Pinus genus, and I particularly enjoyed speculating about their tiny ecological niche, of which there are only two - one of them on the Pacific coast not far from our hotel. Their survival is often described as both miraculous and tenuous, and I had to wonder what sorts of mycological help they might be getting. There should be mychozorrheal partners. However, none of the State Park literature mentioned any. 

It's fun to march around on a foggy coast, relaxing and taking photographs, thinking about fungi and wondering what kind of crowd the Celiac Awareness Tour will have tomorrow. The day was gorgeous so I even stopped thinking about my constant obsession: food. However, that obsession has returned, for it is now dinner time.

On the topic of food, here is the latest recipe from my members-only newsletter: 


This treat is black chocolate-quinoa cake, a dessert I've been making about once a month for at least five years. The original version is on the back of Bob's Red Mill quinoa flour packages. You can see it HERE.

If you follow Bob's recipe  - it's still on the flour package - you'll make great-tasting cupcakes. But to turn out truly luscious cakes you'll need some substitutions - primarily black cocoa, which is available from King Arthur Flour - and you'll want to frost the end product, ideally with the chocolate-mocha recipe found in Joy of Cooking.


Last week my wife Leslie and I were invited to a friend's house for dinner. I always bring dessert when we're invited out, but our friend Rebecca can't eat dairy, so I decided to modify this recipe, making it dairy-free. The changes were few, and the results, excellent.

The version described below is the dairy-free one. It's an upside-down cake, topped with chopped pecans that have been laced with honey and molasses. Obviously, those with nut allergies can't eat this, but the topping can be removed without changes to baking time or preparation. I think the frosted version remains superior, so if dairy isn't a problem, skip the upside-down technique and whip up some frosting instead. (Frosting recipe follows cake recipe). Or you can be totally decadent and use both nuts AND frosting. In that case I'd suggest slicing the cake in half and re-arranging the layers so that the nuts are in the middle. Which is what I'm doing from now on. Thank you Rebecca!

Black Chocolate Layer Cake

Makes one 8" circular cake, 6 - 12 servings

Ingredients:

1/4 cup virgin coconut oil
1/2 cup water
1/4 cup King Arthur Flour Black cocoa
1 1/4 cup quinoa flour
1 cup granulated sugar
1/2 tsp baking powder
1/2 tsp baking soda
1/2 tsp salt
3 eggs, separated
1/2 tsp vanilla extract
1/4 cup silken tofu

For the topping:

1/2 cup finely chopped pecans
2 TBLS virgin coconut oil, melted
2 TBLS honey
1 TBLS molasses

For the frosting:

1 2/3 cup 10X confectioner's sugar
3/4 stick butter, barely softened (about 60 F)
2 TBLS red cocoa
3 TBLS decaf espresso, cooled to room temperature
3/4 tsp vanilla extract
1/8 tsp salt


Procedure:

Place the water and the 1/4 cup coconut oil in a small saucepan over medium heat until the coconut oil melts. Remove from heat, whisk in cocoa until mixture is very smooth, then set aside to cool.
Preheat oven to 375 F. Line the bottom of an 8" diameter circular cake pan with baker's parchment. Grease sides of pan. Sprinkle pecans evenly over parchment. Drizzle honey and molasses over pecans. Scatter dabs of coconut oil over this.
In a large bowl, whisk together flour, sugar, baking powder, baking soda and salt. Stir until well blended.
Separate eggs, discarding one yolk. In a medium bowl, whip whites until stiff but not dry. In a separate, small bowl, stir yolks with vanilla and silken tofu until well blended.
Add water/cocoa mixture to flour. Stir until well incorporated. Add yolk/tofu mixture and stir until well incorporated. Fold in egg whites. Pour batter into pan. Bake for 40 - 50 minutes, turning pan 180 degrees once after 20 minutes, until an inserted toothpick comes out clean.  Remove and cool on a rack at least 15 minutes. Place a plate on top of cake, invert cake, then remove pan. Peel away parchment. Allow to cool thoroughly before frosting.

Frosting:

In a medium bowl, mix sugar and cocoa.  In a separate medium bowl, cream butter until fluffy, using a mixer set to medium-high speed, about 3 minutes. With the mixer running, slowly add sugar-cocoa mix. Beat until soft. Add espresso and whip until smooth. Add vanilla and salt and whip about 1 minute. Let stand 5 minutes then whip well. Spread over cake.

Wednesday, March 6, 2013

Quick is Good

Hello Gentle Reader.

After weeks without blogging, I realize I've come to an impasse - and a solution. The former is a direct result of the rapid and thrilling growth of my business, Luce's Gluten-Free Artisan Bread. Working 6 - 7 days a week, I rarely have time to sit at the computer and write. However, as part of my communication with customers, I do send out weekly e-newsletters. Thus my solution: A slightly altered version of the e-newsletter, delayed a week or two and then posted here.

(Interested in first-read-rights? Sign up for my newsletter by clicking HERE and scrolling to the bottom of the home page. BTW the newsletter will have special offers that won't be repeated here.)
           
 Enjoy the post!

 Biscuit Love - Love Biscuits

I’ve always loved biscuits. One of the challenges of Celiac Disease is having to walk away from big trays of them whenever Leslie and I visit the Ohio restaurant chain, Bob Evans. Luckily, I’ve learned to make them from one of my flour blends - Classic Sourdough.

Biscuits can be made in an almost endless variety of ways: coarse-crumb or flaky, sweet, savory, laced with corn meal, shortened with butter or coconut or bacon fat or lard. I like them sweet for strawberry shortcake; full of mushrooms and corn flour for hors d'ouvres;  sour and puffy for sandwiches.

In addition to being very tasty, biscuits have the advantage of being quick and easy to make. If we have drop-in guests or I forget to bake bread for a day, no problem. Dessert can be ready in under an hour as long as the guests like shortcake. And biscuits are as good as bread for many a meal.

There's one more thing: They can be made in small quantities. That's great if your household, like mine, consists of just two people with small appetites.

The recipe below will yield about nine, 1-1/4" diameter sweet biscuits, perfect for dessert for four (with one left over for the cook to eat while waiting for the strawberries to thaw) and easily doubled. Of course you can make them larger. King Arthur Flour makes a honeycomb biscuit cutter that will help, if larger and easier is your goal. I've provided notes for making them savory, in case dessert is not on your agenda. Before you start, I'd suggest purchasing my Classic Sourdough bread mix in the Just Flour configuration and an order of Just Support Sheets. Also note that you will need some extra ingredients.


Enjoy!

Sweet Biscuits
Yield: 9 small biscuits

Ingredients:
1/2 cup (75 grams/ 2.6 Oz.) Luce's Gluten-Free Artisan Bread Classic Sourdough flour mix
1 TBLS (12 grams/0.4 Oz.) Cornstarch
1/2 tsp sugar
1/2 tsp baking powder
1/8 tsp baking soda
2 TBLS (25 grams/0.9 Oz.) unsalted butter, very cold
1/3 cup + 1 tsp (75 grams/2.6 Oz.) buttermilk
White rice flour, sorghum flour or corn meal for dusting

Other equipment:
Medium bowl. Stirring spoon. Shortening "cutter" or wire whisk. Cookie sheet (disposable is fine). 1 1/4" cylindrical cookie cutter.

Procedure:
Preheat the oven to 425 F. Place a cookie sheet on the middle rack.

Dust a countertop or (better) chilled work surface with the dusting flour.
In the medium bowl, mix flour, cornstarch, sugar, baking powder and baking soda. Stir to blend well. Chop the butter into little chunks - each about the size of a Lima bean - and scatter these in the flour. Using the whisk or cutter, cut the shortening into the flour until the mix is very coarse, like fine gravel.
Add buttermilk to the flour and stir until the dough just comes together. Turn out onto dusted work surface. Sprinkle dusting flour on dough and pat dough into a layer about 1" thick. Dip the cookie cutter into rice flour and use it to cut cylinders of dough, arranging these on a sheet of parchment (support sheet) with at least 1" of space around each cylinder. Gently pat leftover dough together and cut additional cylinders. The last piece of dough may be formed into a simple ball.
Bake for 15 minutes or until biscuits are flecked with golden brown.
Cool on a rack, but serve while slightly warm.

Options:
Eliminate sugar to create a savory biscuit.
Eliminate soda and sugar to create a sourdough biscuit.
Double sugar for sweeter biscuits.
Substitute cornstarch with cornmeal for a crunchier, heartier treat.
Use coconut oil, bacon drippings or lard instead of butter.
Drip some truffle oil onto the butter before cutting it in.
Use Vegan shortening instead of butter.
Chill the flour before beginning and handle dough like puff pastry dough to produce flakier biscuits. 


"Pig Ears" - sourdough biscuits with braunschweiger and mustard.


Haitian - sweet biscuits with home-made Confiture de Chadéque


Midwestern - with honey

Monday, October 1, 2012

Happy Days


Finally the day has arrived! With blessings from the State of New Jersey, I began producing dry flour blend last week. It now is just a matter of days until I have enough inventory to start selling and shipping.


  Standing at my stainless steel prep table and bopping to old Gretchen Wilson tunes, I’m happier than I’ve been at work for years. Everything about the moment reminds me of the time immediately after graduate school, when I worked 12 hours a day in the darkroom. Now, as then, I’m on a trajectory of converting discoveries into tangibles. The difference being that everyone can consume today’s tangibles. They’re not just designed for art collectors. 

It is immensely gratifying to embrace the work that’s taken a lifetime to discover. While it would be tempting to regret the years doing other things, it would also be a mistake. Everything counts: the botany my mother taught me, my father’s political analyses, the science I studied in high school and thought I’d pursue as a career until math beat me up, the ways I messed up as an undergraduate, the art I made, the art career at which I did not succeed, the years of teaching, the celiac disease that laid me low.

Sometimes my body wishes I’d reached this work sooner. Lifting an 88-pound sack of flour or crawling hands-and-knees on a concrete floor to vacuum up debris truly is better work for 20-somethings. But I’m proud to still be able to do it, even if it hurts the next day. I guess it’s safe to say that a life of adventure sports also counts. Being able to climb 5.9, skate pre-bronze, and tele-ski double diamonds, while not stupendous accomplishments, have left me with the strength and agility to bounce back from most insults.

But the purpose of today’s posting is not to brag; it’s to celebrate and acknowledge. A point has been reached in a cycle, and the next spin of the wheel is bound to be interesting. 

 I must say I did not get here alone. I truly am standing on the backs of others, from my government - which created the roads I travel on, the sewers and water supply I need, and the tax structures and food regulations which keep me and my consumers safe - to the consultants, partners and friends who’ve supported and advised and helped so much. My wife Leslie Bryan deserves special praise. It was her suggestion that I “Do something with that baking talent after you retire” that got me on this track. Her constant encouragement in the kitchen and at the dining table keeps me going. My friend Paul Sadowski also deserves praise. Paul suggested I make a bake-at-home product, which prompted me to develop the bread-in-a-bag technology I use today.

I know I’ll miss some deserving names, but I have to do this. Public thanks extend to my business partner TJ Fontenette and his wife Vanette. Their insight and acumen were crucial to the launch of this project. Their children are my biggest fans, too. Jan Kahn of Godiva Chocolates contributed terrific early advice, as did retired baker Frank Kitchens. Although she does not know it, cookbook author and GF guru Annalise Roberts contributed hugely. So did the late Bette Hagman. Same goes for Dee of Dee’s One Smart Cookies; chef Rebecca Riley; bread-maker and sourdough advocate Sharon Kane; great friends Betsy and Gary Ford; in-laws Bob and Ann Bryan (a BIG special Thank You for your extreme generosity); chef Arlene Jacobs; author Eugenia Bone; logo designer Andrea Rinaldi; packaging designer Anna Ocón Beltrán; all my honest (and some dishonest!) taste-testers; friends who put up with early versions of “bread”; you my gentle readers; and the dozens of email responders, scientific article-writers, librarians, bakers, telephone-answerers and bookstore clerks who put up with the slightly crazed researcher who is me. 

Dessert = Gut. 
Alas I’m not posting any recipes today. It’s not that I’m too busy to make dessert (that would be inexcusable!), it’s just that I want to get this News and Thank-You out. And, maybe, take a little breather from dessert: I had a friend over for dinner the other night and between us we polished off a dozen micro-pies. Translation: I need to spend an hour this afternoon in the pool, not with a rolling pin. Stay tuned, however - I want to make some deconstructed things. Apples are flooding the markets, and this also is the season for hot chocolate. I’m thinking upside-down apple pie (crust-filled apples in a bowl), and cookies made with cocoa instead of flour and “chunked” with pieces of puff-pastry. All in small sizes for families like mine.

See you next post - and don’t forget to check my website and sign up for my newsletter.

Saturday, June 2, 2012

Getting There


Finally, I’ve arrived!
Future Home of Luce's Gluten-Free Artisan Bread
I know this photo isn’t much to look at, but it depicts the actual, real home of Luce’s Gluten-Free Artisan Bread. Once the plumbing goes in and equipment installed, this site will be recognizable as a clean, safe environment for producing what I do best: ready-to-mix and virtually instant artisan bread dry blends. 
This is a very exciting time for me. If there’s one thing I’ve learned from retirement, it’s that I need a lot of physical activity. The amount of desk-sitting I’ve done over the past year - calling bakeries, writing contracts and emails, finding and communicating with suppliers - and waiting, waiting, waiting for people to get back to me - has not set well. I’m ready to get my hands dusted with flour. Work up a sweat. Mix and package and sell my remarkable blends.
As work on my facility progresses I’ll post more photos, as well as a narrative of the “action,” which in this case means coping with bureaucracy. Lots of it. 
(A note to my friends in New Jersey: this isn’t a retail sales operation, so you can’t drop by and pick up a package of Bread-In-A-Bag. Sorry!)
And something for all of you, gentle readers: first notice that my virtual store is open will go to people who’ve signed up for my newsletter. This is an easy thing to do - just click HERE, wait for the page to open, scroll to the bottom and enter your email in the noted place. My newsletter is quarterly, ad-free, and contains recipes and special offers as well as opportunities to purchase my newest products, which I hope to roll out regularly.
OK - so much for self-promotion. Let’s talk about food! 
Black trumpet mushrooms - arriving in NJ in July
I’m writing this at lunchtime with hunger stalking my insides, a sensation that’s enhanced by the aroma of cooking mushrooms. A saucepan of chicken mushrooms (Laetiporus sulphureus) in milk is simmering on the stove. Later, I’ll strain off the orange colored, mushroom flavored broth to make a wild mushroom custard, which I’ll serve with braised bone marrow. The mushrooms themselves will have to be tossed into the garbage - this batch is too tough to chew. I knew when I found them they were stale. Chicken mushrooms that are beyond fresh have the texture of cardboard, but their rich, excellent flavor is undamaged. I’m simply transporting it into a fat vehicle (whole milk) for later use. 
Shredded bread 
But my intent wasn’t to write about mushroom custard. Instead I want to share my recipe for veggie-burgers. 
As most of us with celiac disease have discovered, restaurant or store-bought vegetarian “hamburgers” are unsafe. Luckily, making one’s own is not hard. Cooked beans, a bit of onion, an egg, GF oatmeal if you can tolerate it, GF bread crumbs if you can’t, and whatever seasoning floats your boat, is all it takes. You can be sloppy, measuring ingredients by eye or intuition, and still end up with good tasting results. The “burgers” cook up splendidly in a skillet or electric griddle like the George Foreman Grill, but shine as well when seared over charcoal.
My recipe includes bread crumbs sautéd in a blend of butter and black trumpet mushrooms (Craterellus fallax). If you can’t find black trumpets or don’t like them, a substitution is listed.
Ingredients for Veggie-burgers

Black Trumpet Veggie-Burgers
Ingredients:
4 TBLS black trumpet butter (recipe below).
1 cup coarsely-chopped bread crumbs (GF or other).
1/2 cup oatmeal (GF or other).
2/3 cup cooked white beans, drained. Liquid reserved.
2 TBLS coarsely chopped red onion.
1 egg 
Spices to taste: garlic flakes, paprika, salt, cumin, parsley, black pepper.
Black trumpet butter: 
Sauté 2 quarts of fresh, cleaned, chopped black trumpet (Cantherelles fallax) mushrooms in 1 stick of unsalted butter. When mushrooms are done (about 8 minutes), remove from heat and allow to cool.  Soften another 3 sticks of butter to room temperature. Put mushrooms and their cooking fat, plus the three sticks of soft butter, in a food processor and process to a smooth, dark paste. Divide into small units, reserving 4 tablespoons and freezing the remainder. 
Notes: 

If you are unable to find or don’t like black trumpet mushrooms, substitute the bread crumbs and trumpet butter (step 1) as follows: Sauté 1/2 cup chopped mushrooms in butter, increase amount of oatmeal to 3/4 cup and increase beans to 1 cup.
If you cannot tolerate GF oats, substitute with quinoa flakes.
Method: 
1) Melt the black trumpet butter in a skillet over medium flame. Gently sauté the bread crumbs until they are slightly crisp and saturated with the mushroom mixture. Remove from heat and allow to cool.
2) Place the oatmeal, beans, onion and about 2 tablespoons of the bean liquid in a food processor. Pulse 4 - 5 times to blend. You do not want to make a purée, only a coarse chop. Add the egg, bread crumbs and spices and pulse a few more times. Scoop up mixture in your hand. If it holds together in a ball when shaped and squeezed if is wet enough. If not, add a tablespoon or two of bean water and pulse a few times.
3) Allow the mixture to rest 10 minutes. Add a bit more liquid if necessary. Shape into patties, and fry in an oiled skillet, in a home griddle, or on an outdoor grill. Thorough cooking is essential - about 5 minutes per side, or twice as long as the average hamburger. 
4) Serve on a bun with condiments of your choice. 
(A bun recipe will be part of my summer newsetter. Sign up HERE)
Leftovers can be stored in the refrigerator for 2 days or frozen in a sturdy plastic bag.

Monday, April 23, 2012

Custard 102


Creamy, crunchy, etc...


When last we spoke, Gentle Reader, you were holding a soggy pie shell filled with pinkish and not-quite-perfect fruit custard (if, that is, you had the stamina to follow me through childhood food adventures and half a rant about food nuts) and wondering when you’d be “filled in” with the info needed to reach nirvana. 
Perfect Dessert is what we were after - the sublime blend of crunch and smooth, of sugar and fat and fruit. Competition for Food Number One - Ice cream. Simultaneously luscious and chewy, decadent and fulfilling. Small enough to not overwhelm but rich enough to threaten to.
With fruit custard pie I was on track, but for my goals to be met the shell could not soggy.  Flakiness was essential. The shortening couldn’t cloy and the flavors needed to be complex, nutty, and a little mysterious. Also, the amount of shell had to be ratioed perfectly to the amount of custard. Too much or too little of either and the experience would be incomplete.
It struck me that there was a way to accomplish this. I’d make flat discs of pie shell, make small units of custard, then combine the two just before serving. That way I could control all parts of the synthesis.
This time I reverted far into childhood and made a lemon custard. Again this is something I can’t imagine my mother making, but yet she must have, for right next to a taste-memory of banana custard is one of lemon custard. Smooth and citrus-y and sweet and yellow as an egg yolk, I can feel it on my tongue as surely as if it happened yesterday.
Just like childhood, but without the high chair.
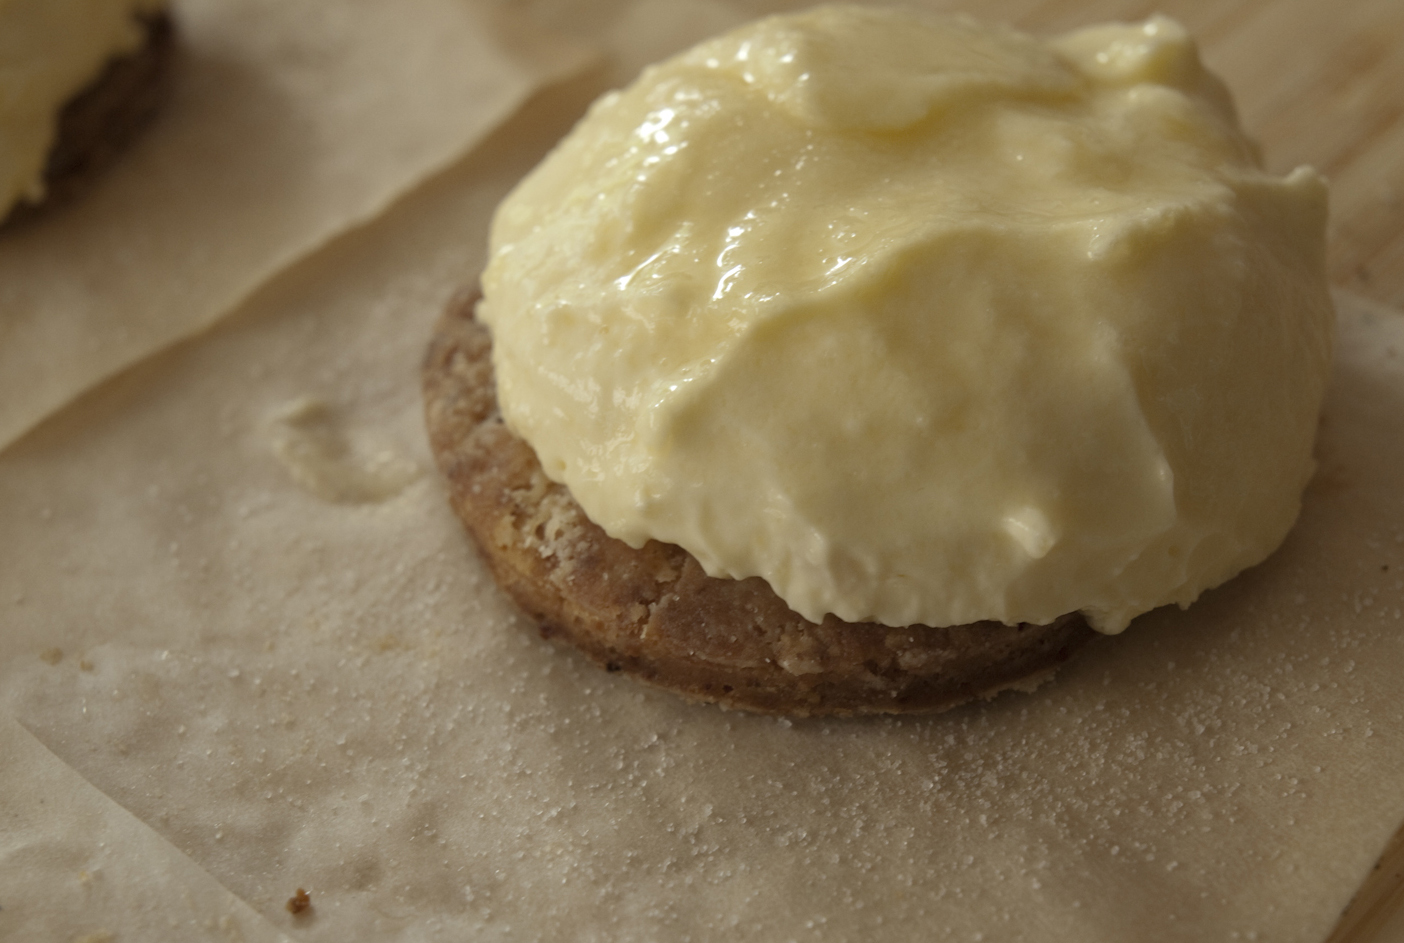
Well, actually, it did happen yesterday, because that’s when I made “Not ‘Nillas” - so called because they so much look like ‘Nilla wafers, and yet they are so much Not.
The wafer part came easily. I had some leftover pie dough in the ‘fridge. It was a cinch to roll it out to @ 1/8” and use a cookie cutter to form 2” rounds. I might have fancied them up by making them wider, then turning up and shaping a scalloped edge, but at that moment I was a tad too hungry .....er..... I mean enthusiastic. 

7 minutes in a 425 F oven baked them nicely. While they cooled I reset the oven temp to 325 and prepped the custard.
Getting just the right size was important. I used some tiny bowls my wife Leslie gave me for Christmas some years back. Each holds 1/8 cup (2 tablespoons) and is perfect for measuring small amounts of ingredients, which is why Leslie got them. She’d seen me struggling with my tenth-gram scale and Pyrex measuring cups, which overwhelmed it, and thought I could use smaller containers. They worked perfectly, and I thought they’d be just as perfect for molding custard. I buttered them and poured in my custard blend, set them in a medium sauce pan, poured in an inch of boiling water and viola!, bain Marie. 20 minutes was all it took to set the custard, and another 20 to cool. Chilled in the refrigerator they looked promising, but, sadly the custard did not disengage easily. Turned over onto the discs the custard flopped and fractured and ended up not looking very professional. Nonetheless I took a bite.
OMG! Dessert nirvana! They looked so plain and yet tasted so wonderful! Even Leslie, my custard-hater-in-residence, willingly ate one. Two. Hey, That's Mine!!!
There remained only one part to adjust, an element I’d not considered when embarking on this project: temperature. I like my custards chilled, but I don’t enjoy a cold pie crust.   This was easily fixed by giving the crust a few seconds in the microwave and mounting the custard very chilled. Served immediately, before the two entities had a chance to perform temperature exchange, they really were perfect.
Smitten and bitten. Or vice-versa.

The custard formula, by the way is:
Stir together 1 large egg and 1 large egg yolk. Put a medium bowl on the kitchen scale and pour the egg mix in. Note the weight. Add about 1 1/3 this amount of heavy cream, a tablespoon of lemon juice, and whatever amount of whole milk needed to bring the liquid weight to 2 times the egg weight. A pinch of salt and a tablespoon of sugar completes the ingredient list. Whisk together thoroughly and pour into 4 Oz. ramekins or little ceramic measuring cups. Put in a bain Marie and bake at 325 until the edges of the custard set and the center is jiggly. Carefully remove and allow to cool before refrigerating.
Thus ends my series of one-bite desserts. Which, the astute reader will notice, has strayed considerably into multi-bite territory.
In the coming weeks you’ll be following me as I sojourn through suburban building and health departments to launch my Bread in a Bag business. Wish me luck, Gentle Reader, and have some Not ‘Nilla while I sweat.