After weeks without blogging, I realize I've come to an impasse - and a solution. The former is a direct result of the rapid and thrilling growth of my business, Luce's Gluten-Free Artisan Bread. Working 6 - 7 days a week, I rarely have time to sit at the computer and write. However, as part of my communication with customers, I do send out weekly e-newsletters. Thus my solution: A slightly altered version of the e-newsletter, delayed a week or two and then posted here. (Interested in first-read-rights? Sign up for my newsletter by clicking HERE and scrolling to the bottom of the home page. BTW the newsletter will have special offers that won't be repeated here.) Enjoy the post! Biscuit Love - Love Biscuits
I’ve always loved biscuits. One of the challenges of Celiac Disease is having to walk away from big trays of them whenever Leslie and I visit the Ohio restaurant chain, Bob Evans. Luckily, I’ve learned to make them from one of my flour blends - Classic Sourdough.
Biscuits can be made in an almost endless variety of ways: coarse-crumb or flaky, sweet, savory, laced with corn meal, shortened with butter or coconut or bacon fat or lard. I like them sweet for strawberry shortcake; full of mushrooms and corn flour for hors d'ouvres; sour and puffy for sandwiches.
In addition to being
very tasty, biscuits have the advantage of being quick and easy to make.
If we have drop-in guests or I forget to bake bread for a day, no
problem. Dessert can be ready in under an hour as long as the guests
like shortcake. And biscuits are as good as bread for many a meal.
There's
one more thing: They can be made in small quantities. That's great if
your household, like mine, consists of just two people with small
appetites.
The recipe below will yield about nine, 1-1/4"
diameter sweet biscuits, perfect for dessert for four (with one left
over for the cook to eat while waiting for the strawberries to thaw) and
easily doubled. Of course you can make them larger. King Arthur Flour makes a honeycomb biscuit cutter
that will help, if larger and easier is your goal. I've provided notes
for making them savory, in case dessert is not on your agenda. Before
you start, I'd suggest purchasing my Classic Sourdough bread mix in the Just Flour configuration and an order of Just Support Sheets. Also note that you will need some extra ingredients.
Enjoy!
Sweet Biscuits Yield: 9 small biscuits
Ingredients: 1/2 cup (75 grams/ 2.6 Oz.) Luce's Gluten-Free Artisan Bread Classic Sourdough flour mix 1 TBLS (12 grams/0.4 Oz.) Cornstarch 1/2 tsp sugar 1/2 tsp baking powder 1/8 tsp baking soda 2 TBLS (25 grams/0.9 Oz.) unsalted butter, very cold 1/3 cup + 1 tsp (75 grams/2.6 Oz.) buttermilk White rice flour, sorghum flour or corn meal for dusting
Other equipment: Medium
bowl. Stirring spoon. Shortening "cutter" or wire whisk. Cookie sheet
(disposable is fine). 1 1/4" cylindrical cookie cutter.
Procedure: Preheat the oven to 425 F. Place a cookie sheet on the middle rack. Dust a countertop or (better) chilled work surface with the dusting flour. In
the medium bowl, mix flour, cornstarch, sugar, baking powder and baking
soda. Stir to blend well. Chop the butter into little chunks - each
about the size of a Lima bean - and scatter these in the flour. Using
the whisk or cutter, cut the shortening into the flour until the mix is
very coarse, like fine gravel. Add buttermilk to the flour and stir until the dough just
comes together. Turn out onto dusted work surface. Sprinkle dusting
flour on dough and pat dough into a layer about 1" thick. Dip the cookie
cutter into rice flour and use it to cut cylinders of dough, arranging
these on a sheet of parchment (support sheet) with at least 1" of space
around each cylinder. Gently pat leftover dough together and cut
additional cylinders. The last piece of dough may be formed into a
simple ball. Bake for 15 minutes or until biscuits are flecked with golden brown. Cool on a rack, but serve while slightly warm.
Options: Eliminate sugar to create a savory biscuit. Eliminate soda and sugar to create a sourdough biscuit. Double sugar for sweeter biscuits. Substitute cornstarch with cornmeal for a crunchier, heartier treat. Use coconut oil, bacon drippings or lard instead of butter. Drip some truffle oil onto the butter before cutting it in. Use Vegan shortening instead of butter. Chill the flour before beginning and handle dough like puff pastry dough to produce flakier biscuits.
"Pig Ears" - sourdough biscuits with braunschweiger and mustard.
Haitian - sweet biscuits with home-made Confiture de Chadéque
So here it is July 1 and no bread business yet. I’m getting closer, but nothing is showing. At least not in the facility I’ve rented - which sits waiting in the summer sun for the township building department to cough up a permit for my three-part sink. Once they do, things should move. And show. And if you like photos of plumbers at work, I’ll have some.
In the meantime you’ll hopefully content yourself with a look at my updated website: HERE. As you can see I'm trying to keep things simple - bread mixes and nothing but, and just two, at least for the time being.
There’s one thing troubling me. It should be the same thing troubling anyone starting a gluten-free business: What if the whole gluten-free diet craze collapses before my business gets off the ground.
A morning's work.
It’s a reasonable fear. That the GF diet has “craze” or “fad” elements is, I think, beyond dispute. Recently I saw a study that indicated only 10% of shoppers buying GF goods had celiac disease or gluten insensitivity. When 90% of buyers are purchasing foods that have no proven benefit, it’s a fad.
To misquote Andy Warhol, fads have a life span of only 15 minutes. With consumers spending about $6 billion in gluten-free goods in fiscal 2011, my guess is that we’re well past minute 7.5. Which means, the fad is on its way out.
You can see this already in the fringes. The hair shirt crowd has decided that giving up gluten isn’t enough, and are demanding their followers give up all grains. (They call this the Paleo diet. Mastodon for dinner, anyone?) And sugar - “usual suspect” #1 whenever a pleasure-giving substance needs beaten up - is re-appearing in TV shows and web blasts as Evil Incarnate, shoving gluten aside.
So why, given this trajectory, go into a gluten-free business at all? My answer: legacy.
The ultimate contribution we in GF foods will make is not health but the introduction of new and wonderful flavors to the world’s palate.
micro-pies with rice-flour-almond crust
I know this is hard to believe. GF has the (well-earned) reputation for producing foods that only a desperate soul would consume. Anyone who received a celiac disease diagnosis 5 or more years ago is familiar with the genre. Crackers that punished the teeth. Door-stop bread. Cakes that dissolved into powder.
These products linger, but they’re now the minority. We who must eat gluten-free have as many tasty, healthy and easy-to-find dining options as those with normal digestive systems. Some baking and cooking professionals have even risen to that old art-school slogan, “Good Enough Never Is” and decided that “As good-tasting as wheat” is not what’s needed; gluten-free must be more.
Beyond the tired old ways of making things with wheat flour, gluten-free is inspiring new options, new tastes. Consider: before the GF craze, who outside of Ethiopia had ever heard of teff, let alone tasted it? Has any wheat-flour baker tweaked spicy flavors from pie crust, without adding spices? We who are gluten-free can smilingly say, “We have!”
Wheat-based bakers primarily rely on three grains. Gluten-free bakers use at least eight (millet, sorghum, corn, buckwheat, rice, teff, amaranth, quinoa), and that’s not counting the varieties within each family (ie: dark teff, ivory teff, red teff). Plus we augment our flours with many starches. In both categories we’ve introduced flavors previously unknown in our cultures.
Not wheat but sourdough nonetheless. Whole grain and good!
Our legacy is with breads that are astonishingly good and taste nothing like wheat breads, in cakes and cookies and pies that delight the tastebuds with lush and interesting new flavors, in crackers with luscious chew and flatbreads that combine crunch and moist in unexpected yet wonderful ways.
Which is why I’m opening my gluten-free business. I think my breads will fill the bill. Egotistic? Perhaps. But I won’t claim to be the only one inventing legacy foods. Next time you’re the supermarket, pick up a bag of Bob’s Red Mill quinoa flour and try the chocolate cupcake recipe on the back. If those aren’t gluten-free cakes worth legacy status, I don’t know what is.
And for those of you with a love of experiment and a family willing to lap up your trial recipes, here’s two ideas I’m sure can be molded into legacies. I’ve put them aside in favor of breads, but I know that someone - maybe YOU, gentle reader - can do wonders with them.
Fresh red raspberries and buckwheat kernels, ready for the kitchen.
1)Buckwheat and raspberries
2)Ivory teff and seafood.
And there, I’m out of ideas for another round of writing. When next I sit at this keyboard I hope to have business progress to report. In my world the installation of a three-part sink is the most yearned-for of events.
Today's puzzle - what the $#@!! is going on here??? (see below)
At the present moment, writing about my business is rather like reporting the function of a healthy immune system. Things are humming along, with all the organs in the background doing their jobs. A comforting picture, but boring.
The town of Berkeley Heights New Jersey has my building permit application. My plumber is waiting in the wings, as are my equipment and raw materials suppliers. My packaging designer is on her third draft, my business partner is reviewing the packaging copy, and I’m waiting for several vendors to call me with estimates. I have finished one thing: a short promotional video, embedded here:
So, clever music and a pretty actress (that’s my wife, Leslie) aside, there’s not much of interest going on with my business, gentle readers. So I’m going to write about pie.
Pic crust tools and ingredients chilling in the 'fridge
For the past year or so I’ve been chiding Gary Lincoff, author of The National Audubon Society Field Guide to North American Mushrooms, whenever he posts a pie photograph on his Facebook page. “You need to make a gluten-free version!” I nag. At which I can just about hear a big chunk of his followers saying, “Yuk!”
It’s easy to wince at the concept of gluten-free pie crusts if you’ve never tasted a good one. However, since half the effort of making a wheat flour crust consists of preventing gluten from over-developing, removing gluten from the formula doesn't create much loss.
A scant eighth teaspoon of Xanthan gum - crucial ingredient for GF crust
I’ve been rolling pie crusts since I was 4 or 5. Which is not to say I’m any kind of baking expert; I’m not. I do love pie, however, and am quick to judge crust quality. (Point of historical fact: my mother’s relatives, the Mallery family, used to have reunions every August. There was silent but intense competition among the women as to who made the best pie. Which was emphatically not about the filling, but the crust.) So when I say I’ve got a good gluten-free crust formula, please take me seriously.
Half a stick of butter (4 tablespoons)
Although I’ve blogged about pies before, it’s time to write a very specific recipe if for no other reason that Mr. Lincoff has come out with a new book, The Joy of Foraging. He’s so good at finding wild edibles there’s sure to be Facebook posts all summer regarding pies made with found fruits. I’m thinking that people like me (ie - celiac sufferers) deserve to enjoy what nature offers in final, sugar-drenched, baked form too. So here goes.
Flour
A great deal of what happens in the ideal pie crust has to do with how the ingredients are handled. Therefore, the type of flour is not totally critical. That said, I believe two things are important about flour: it needs to be Easy, and it needs to taste Good.
Unfortunately there is no single gluten-free grain flour that will make great piecrust. All GF flours are blends - grain flour + starch flour + dough enhancers/gluten substitutes. You can buy pre-mixed flours, and that’s great, but in my house there’s so many flours I can make special blends for different types of pies (more on that, below). The one thing all my blends have in common? They’re based on a simple formula: Bette Hagman’s Featherlite blend.
The late Ms. Hagman came up with this mixture decades ago. In my opinion it can’t be beat for sweets, although I sometimes modify it. The recipe: 1 cup white rice flour, 1 cup corn starch, 1 cup tapioca starch, 1 tablespoon potato flour.
There’s an easy way to blend these dry ingredients: put them into a big ziplock bag, leave a good amount of air, zip the bag closed and shake it like mad. Depending on the size of your bag (and your willingness to clean up should the seal fail) you can make rather large quantities this way.
Once you’ve got the flour you can focus on handling, the first step to which is, chill everything.
Thin slices of cold butter
A pie crust should be nicely flaky. To accomplish that, unsalted butter is the best shortening. Butter contains water, which, under the right circumstances, changes quickly to steam and lifts surrounding dough. As this is going on the butter melts, coating the flour grains. In combination with the naturally occurring sugars in the grains, the fat-soaked flour turns crispy.
That’s a lot to happen all at once - or at least in fast sequence - so to make all the pieces play together it’s critical to prep them. Which is where temperature comes in. You’ll want the butter to be flat sheets, thin enough to melt fast but thick enough to perform lift. And, you’ll want the butter to be solid until the instant the crust hits the oven. That’s what keeps the most water in the butter and makes the tastiest flakes. Therefore, you want the butter to be cold throughout the crust-making process.
I keep butter, flour, dough enhancers, a wooden work surface, a bench knife and a thick ceramic mixing bowl in the refrigerator, waiting for fresh fruit. Once a harvest comes in I figure out how much pie Leslie and I can eat, and get working. (BTW - that photo at the top of the page? When I make crust on a hot day I chill the rolling board further with whatever is in the top of my freezer.)
Preparation
Ready to be chopped and ground
Making pie crust is yet another example of the superiority of weighing, rather than dry measuring, ingredients. Keep in mind that digital kitchen scales are now quite cheap. I see them in pharmacies for $10.
The basic weight ratio of pie crust ingredients is: 3 parts flour, 2 parts shortening, 1 part ice water. Experience tells me I can make a quarter-sheet of mini-pies - enough to last about a week in my household - with a crust recipe founded on 1/2 stick of butter. If I reach into the ’fridge and find 1/3 stick or 2/3 or 5/8 stick, it hardly matters. I just weigh the butter; all else follows. If you’re bad at math like me, divide the butter weight in half. That gives you the ice water weight. Multiply the ice water weight by three. That gives you the flour weight.
You can make a decent pie crust using the ingredients above, if you use good technique. However I do some modifications that work wonders. For a half butter stick quantity, I add two teaspoons of rice vinegar to the water (weighing both together), and substitute 1/4 the flour with almond meal, which I make by coarse chopping almonds, then running them through my spice grinder until they threaten to become almond butter. (Admittedly it is easier to buy almond flour, which is available at many grocery stores.) The flour should also get a scant 1/8 tsp xanthan gum, a pinch of salt, and two teaspoons of sugar.
Butter shavings in cold flour
If I’m making a pumpkin, squash, sweet potato, pecan or “Derby” pie, I use teff flour in my featherlite blend instead of rice flour. Dark teff is earthier and rye-like; ivory teff is spicier and can have notes of fish (try it for a seafood quiche).
Technique
This is the crucial part, and the only kitchen task I try to accomplish at speed. Keeping the ingredients cold is important, and a bit challenging, especially in the summer.
Put the chilled rolling board on your work counter. Drape a couple of layers of plastic wrap - big, generous pieces at least 18” long - over the board. Set the cold bowl and a bench knife on the board. Stick the water + vinegar in the freezer. Unwrap the butter. Measure flour, sugar, xanthan gum and salt into the bowl, and stir to mix.
The well awaits
Using the cold bench knife, slice the butter across its end into pieces @ 1/16” thick, tossing into the flour as you cut. From time to time stir the flour with your fingertips so that the butter chunks get coated and stay cold. When you have all the butter cut, toss the flour/butter lightly to distribute chunks evenly.
Using just your fingertips, press each piece of butter through the flour and against the side of the bowl to squeeze it into a big flat flake. Toss from time to time. When all or most of the butter is pressed, overturn the bowl onto the plastic sheets. Gather the blend into a mound and form a well in the center. Retrieve the ice water, punch through the thin skin of ice on top, and pour it into the well.
First fold. Note flakes of butter and oozing water
Toss the flour that forms the “hillsides” down onto the well until the wet dough/water is covered. Pick up one end of the plastic wrap, then fold it onto the other end, enclosing the dough. Press and pound until the mix is 1/2” to 3/4” thick. Unwrap the top layer of plastic, scraping any dough that sticks back onto the dough mass, and use the bench knife to fold the dough into thirds, like a business letter.
At this moment you are probably wondering what kind of madman I am, calling what’s on your work surface “dough”. It’s a dry-on-the-outside, sticky-in-the-middle, water-oozing, semi-rectangular mass. But bear with me.
Third fold. Slowly, the mess becomes dough.
Close up the plastic again and press/pound the dough flat, trying to work the “package” so that when you fold it the next time the folds will be at 90 degrees to the last set.
Repeat these cover-pound-uncover-fold-re-cover actions 4 to 6 times, until the dough begins to look like dough. Then wrap it up in the plastic and stick it back in the ‘fridge, where it needs to rest 6 or more hours before being rolled.
And that’s really all there is to it - with but one additional thought: When you roll the dough you’ll get better results if your rolling board is chilled and coated with a rubbed-in tablespoon or two of superfine brown rice flour.
Ready for refrigeration. Several hours of rest will allow all the water
to be absorbed and the dough will be ready to roll.
I’m not going to suggest pie fillings. That’s best left to folks like Gary, who seem to have more ideas for wild edibles than I ever will. But I will tell you my absolute favorite: wild huckleberries. I wish I had some right now!
When last we spoke, Gentle Reader, you were holding a soggy pie shell filled with pinkish and not-quite-perfect fruit custard (if, that is, you had the stamina to follow me through childhood food adventures and half a rant about food nuts) and wondering when you’d be “filled in” with the info needed to reach nirvana.
Perfect Dessert is what we were after - the sublime blend of crunch and smooth, of sugar and fat and fruit. Competition for Food Number One - Ice cream. Simultaneously luscious and chewy, decadent and fulfilling. Small enough to not overwhelm but rich enough to threaten to.
With fruit custard pie I was on track, but for my goals to be met the shell could not soggy. Flakiness was essential. The shortening couldn’t cloy and the flavors needed to be complex, nutty, and a little mysterious. Also, the amount of shell had to be ratioed perfectly to the amount of custard. Too much or too little of either and the experience would be incomplete.
It struck me that there was a way to accomplish this. I’d make flat discs of pie shell, make small units of custard, then combine the two just before serving. That way I could control all parts of the synthesis.
This time I reverted far into childhood and made a lemon custard. Again this is something I can’t imagine my mother making, but yet she must have, for right next to a taste-memory of banana custard is one of lemon custard. Smooth and citrus-y and sweet and yellow as an egg yolk, I can feel it on my tongue as surely as if it happened yesterday.
Just like childhood, but without the high chair.
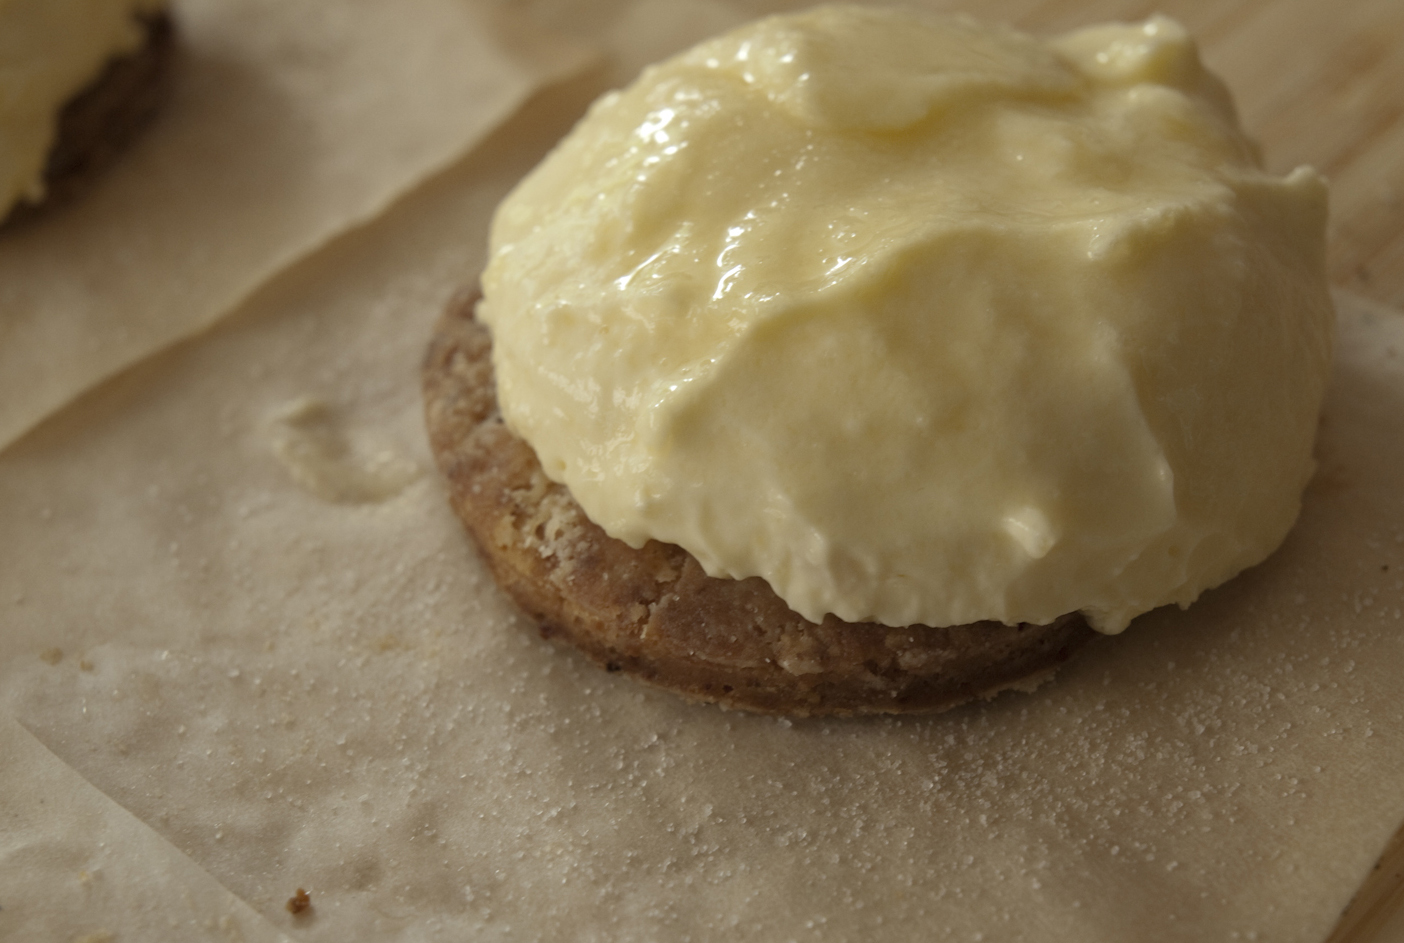
Well, actually, it did happen yesterday, because that’s when I made “Not ‘Nillas” - so called because they so much look like ‘Nilla wafers, and yet they are so much Not.
The wafer part came easily. I had some leftover pie dough in the ‘fridge. It was a cinch to roll it out to @ 1/8” and use a cookie cutter to form 2” rounds. I might have fancied them up by making them wider, then turning up and shaping a scalloped edge, but at that moment I was a tad too hungry .....er..... I mean enthusiastic.
7 minutes in a 425 F oven baked them nicely. While they cooled I reset the oven temp to 325 and prepped the custard.
Getting just the right size was important. I used some tiny bowls my wife Leslie gave me for Christmas some years back. Each holds 1/8 cup (2 tablespoons) and is perfect for measuring small amounts of ingredients, which is why Leslie got them. She’d seen me struggling with my tenth-gram scale and Pyrex measuring cups, which overwhelmed it, and thought I could use smaller containers. They worked perfectly, and I thought they’d be just as perfect for molding custard. I buttered them and poured in my custard blend, set them in a medium sauce pan, poured in an inch of boiling water and viola!, bain Marie. 20 minutes was all it took to set the custard, and another 20 to cool. Chilled in the refrigerator they looked promising, but, sadly the custard did not disengage easily. Turned over onto the discs the custard flopped and fractured and ended up not looking very professional. Nonetheless I took a bite.
OMG! Dessert nirvana! They looked so plain and yet tasted so wonderful! Even Leslie, my custard-hater-in-residence, willingly ate one. Two. Hey, That's Mine!!!
There remained only one part to adjust, an element I’d not considered when embarking on this project: temperature. I like my custards chilled, but I don’t enjoy a cold pie crust. This was easily fixed by giving the crust a few seconds in the microwave and mounting the custard very chilled. Served immediately, before the two entities had a chance to perform temperature exchange, they really were perfect.
Smitten and bitten. Or vice-versa.
The custard formula, by the way is:
Stir together 1 large egg and 1 large egg yolk. Put a medium bowl on the kitchen scale and pour the egg mix in. Note the weight. Add about 1 1/3 this amount of heavy cream, a tablespoon of lemon juice, and whatever amount of whole milk needed to bring the liquid weight to 2 times the egg weight. A pinch of salt and a tablespoon of sugar completes the ingredient list. Whisk together thoroughly and pour into 4 Oz. ramekins or little ceramic measuring cups. Put in a bain Marie and bake at 325 until the edges of the custard set and the center is jiggly. Carefully remove and allow to cool before refrigerating.
Thus ends my series of one-bite desserts. Which, the astute reader will notice, has strayed considerably into multi-bite territory.
In the coming weeks you’ll be following me as I sojourn through suburban building and health departments to launch my Bread in a Bag business. Wish me luck, Gentle Reader, and have some Not ‘Nilla while I sweat.